Planning is something I do well, something I do often and
usually to the point where I can slightly annoy or at least amuse Ashley. Mainly I feel if I plan enough, I shouldn’t
worry, though it never turns out that way.
The weeks leading up to the haul out for our yard period I planned and
read and doubted like crazy in hopes that we would be as well prepared as we
could be. Problems at work caused me to be a week late getting home, a week
that was supposed to give me time to get things ready. With a few shifts in our
haul out date and fortunately a flexible schedule with the yard we were able to
get the boat out of the water, Finally…
The day before I had gone back to work I ran the engine for
a while and explained to Ashely that I thought we were getting some growth on
the prop and that she would need to run the engine in gear at least once a
week. I had the boat running and at full
throttle would only turn 1800 RPM, a full 500 less than it should. Now don’t get me wrong, it was a great way to
get the carbon out of the engine, but not good for getting the boat to the
travel lift. As this was all going down,
Ashley was washing dishes and yelled to me in the cockpit that something
smelled hot……. Then she quickly upgraded that to “something smells really hot!”
Upon removing the small access plate to the engine compartment, I was
overwhelmed with the alluring odor of antifreeze steam…. Greaaaaaaat. I shut down the engine and pulled the steps
away to get full access. Sure enough, a hose clamp had given up the ghost. How
does that happen? Hoses? Sure! Hose Clamps?? Havn’t had that happen
before. Apparently a few years back when
I replaced all of the hoses on the engine, there were three I missed. I “Missed”
them because it requires taking apart half the dang engine to get to them. So I
told Ashely to not worry about the engine and off to work I went.
Due to us having the greatest dog this side of the
Mississippi and an old but frisky cat, we decided to stay in a condo while the
boat was hauled out. A good friend owned one on the beach and gave us a good
rate. Also the fact that it was still in
the 90s in florida was a good reason too.
Plus in the chaos and stress of the yard, it was nice to actually come home to a real house! So much room!! Not
sure why people need that much room.
The motor over to the yard was slow, 4 knots at full speed,
the prop must be quite the garden of sea life.
I was anxious to get the boat out of the water and look at the bottom.
When we had shipped the boat months earlier, there were a few blisters on the
bottom and I wanted to further investigate. It was shocking to say the least
when a few turned into several hundred. What the heck?! Was it the change from fresh to salt?? HC’s aren’t known to get blisters. The PO had
a new bottom job done on the boat before I bought it and the yard that did it
was sketchy, I’m thinking the barrier coat was not quite done right. Well crap…..
We looked into the possibility of getting it peeled, but we don’t have
the time or the money. We ultimately
just took care of all the big ones and squinted hard enough to not see the
others. Maybe down the line we will take
care of them. At least most were dime
sized or smaller. Oh, and yes, we had
quite the barnacle city on our propeller.
A major reason for hauling out was the awful crunching sound
that was coming from our cutlass bearing. When we bought the boat we discovered that the
cutlass was shot, like really shot. I
was out of town during the survey and I
found out later the surveyor was a friend of the seller. Yay. As mentioned before in this blog the cutlass
was shot because the engine mounts were broken in half. Also missed in the
survey. Every time I put our boat in
gear, it was just a horrible sound of grinding and banging. It was so bad that
I rarely ever took out our boat because I hated to make it any worse. So new cutlass bearing in hand, we started to
work.
If you have a HC, you know this already but unfortunately
you have to drop the whole rudder to pull the shaft. Trust me, you do. Poor design. The rudder is six feet high and has a three
foot rudder post for a total of 9 feet. I
have done a lot of reading and talked to other HC owners to prepare as best I
could but it was a learning experience. We had
the boat blocked a little higher than normal and planned to dig a whole under
the rudder. We had been told to expect the rudder to weigh approximately 150
pounds so after rigging a block and tackle system, Ash and I dropped her down….
Whoa. Well apparently you can’t dig the
whole directly back from the rudder because of the design of the rudder. It
actually needed to be off to one side. So our 2.5 foot deep hole was wrong. Now
we learned this as Ashely was holding it up with all of her weight (I was
knocking the gudgeons off) so I quickly altered the hole best I could. Finally the post came out of the stern and
she was free!! But now to move it. I had set up saw horses to set it on. 150
pounds? Sure! No problem…. Ha! We guess it was more about 225 pounds and most
of that weight at the bottom. Good lord I
almost wrecked myself when we moved it!!
But success!! Rudder off!! Now just pull the prop, unbolt the coupling
and we are in the money! Wohoo!
Riight, so that celebration was quickly over. We rented a prop puller from the prop shop
down the street and thought if we do it right it will be easy. Ash held the tool as I turned the screw and
all was going well until my eye caught sight of something…. Awry. SH!T!!!!
The prop puller had bent our thread bolt down 90 degrees!!! AH!!!
Seriously!!!?!?! Well this is no good……
Ok, well lets get that coupling off. I had been spraying the coupling with PB
blaster for several months now. I was
concerned it was a permanent fixture, mainly because it was all one solid piece
of rust. Well after a run to the
hardware store for a new tool, I got to work removing the six hex bolts holding
it on. Four out of six. Not bad usually for averages. Four bolts came out and
two sheared off. So close yet so far
away. So out came the angle grinder with
cutting wheel and soon we had two halves of shaft coupling. At this point I grabed the shaft and prop as
a whole and went to the prop shop.
I feel it’s never a good sign when people who professionally
work on propellers all come and say they have never seen anything like that
before. Phrases like that usually add
dollar signs. I left them the whole shebang, explained my pity story of not having
a place to live in a week and went home for the day. A few days later I swung by the shop to see
the progress. Kurt at Canaveral Propellers chuckled and said well…… and faded
off. Oh geeez, what now. Apparently we have an SAE shaft 1.25in but
with a metric taper for a metric propeller and apparently someone machined the
end to fit a smaller coupling on and our keyway was a bizarre size. Again he said.. “I’ve never seen that before”
Cha-ching! The Shaft straightening failed because the thread got too stretched
out. In the world of good news though,
he said that the propeller could be bored out to fit a new shaft, but it would
be another week until they would have it all ready to go.
At this point I began the removal of the Cutlass bearing.
From what I have read, this is straight forward. Undo the set screws and with some work, comes
right out. Well two days later, lots of
swear words and lots of advice, I finally got it out. A friend who has spent his whole life in boat
building and repair helped and even he was amazed. Apparently the cutlass was
actually fiber glassed into the boat. The one Set screw was really more for
show. We eventually got down to using a sawzaw, a big freaking hammer and a lot
of bent screw drivers to get the cutlass out.
We cut it to collapse it but being the sides were glassed in, it did not
really want to let go. I was concerned
about the shaft tube and getting the new bearing centered. My friend Mike
suggested I put the shaft in and use it to align the new bearing which I most
likely will need to glass in as well to replace the epoxy that came out with
the old cutlass. It appears the old bearing was floated on the epoxy in the shaft
tube, and I would need to do the same. Fantastic.
In the meantime, Ashley and I went gangbusters on projects. With
the extra time we would be out, we worked on projects that had been on the to-do
list for a while. The bottom was ground
and repaired. I worked on the ongoing
project of putting in our new electronics. The transducer was eventually installed
with only minor hold up. When the hole
was drilled, one side of the hole was an inch thick and the other an inch and a
half. No idea why the hull was laid up that way, but we had a wedge made and
got it to work. We finished running all
new wires in the mast with the installation of a new anemometer, radar, TV
antenna, VHF antenna and new Ethernet wire for the Wifi antenna. We decided to go ahead and step the mast so
that we could finish connecting all the wires and get it out of the way. With the Mast on, I could connect the radar
as well as connecting the transducer wires.
I hope to never again have to install an entire electronics package.
Holy moly what a pain in the arse. We even
had time to put in to counter tops in the Galley. The old ones were white and badly
stained. Once we got everything cleared
out and the sink and faucets removed, it really wasn’t that bad. We bought some
posterboard and Ashley made patterns up in the boat while I cut the formica
down on the ground. There was some tweaking that was needed but overall, it
went really well. Spots there weren’t
cut just right were hidden with black paint and I used black caulk to seal up
all the edges. We were quite surprised at how well it came out and the
difference it makes in the overall appearance of the interior. We also finally got back our new Kranze iron.
The old one and damaged the Bow Sprit when somebody apparently ran into a dock
so I went off to work modifying the bow sprit. After some time, the new Kranze
Iron fit like a charm.
As the days went by waiting for our shaft to be returned, we
decided to go ahead and attempt to put the rudder back on. There were several
reasons for this crazy idea. One, I wanted to make sure we knew how to do it
when it came to crunch time and two, I wanted to be able to start installing
the auto pilot and a new steering cable.
The first part proved to be a great idea. A friend came to help us lift
the behemoth of a rudder. I had the blocks rigged to help, but we quickly
learned that they lifted the rudder at an angle and not straight up. The weight
of the rudder is centered at the rudder post and not where the lifting point
was. It took a lot of grunt work, but we
got it in and we learned a lot about how to do it next time. I painted the lazarette and rudder quandrant
which really cleaned up below. New steering cable was installed as well as the
autopilot computer and compass. The new rudder bearing fit like a glove and the
new packing glands fit nicely as well. I
took what we learned and rigged another set of blocks. A 3:1 purchase that
lifted center weight and a 2:1 purchase on the lifting point. We used this to lower the rudder back down
while we wait on the return of our shaft.
Finally! We get our shaft back! Everything is well machined and
looks great. Now we begin the mad rush to finish. We were In a holding pattern until we got the
shaft. We ended up having to move to
another condo in the area and I had to arrange to head back to work a week
late. With the shaft back, we had two
days to get it all together and back in the water before we were homeless again
and I was heading to the West coast. With
the shaft in, we were able to put in the new cutlass. After that, we had to
re-align the engine to the new set up. We had some friends come help put the
rudder back on. With the new block set up and the extra people, we had the
rudder up and bolted on in just a matter of minutes, it was a beautiful thing
and I had to brag a little about my ingenious block set up. Quadrant on, bearings bolted on, steering
cable run and packing glands in place, she was ready to go back in the water
two days after getting the shaft.
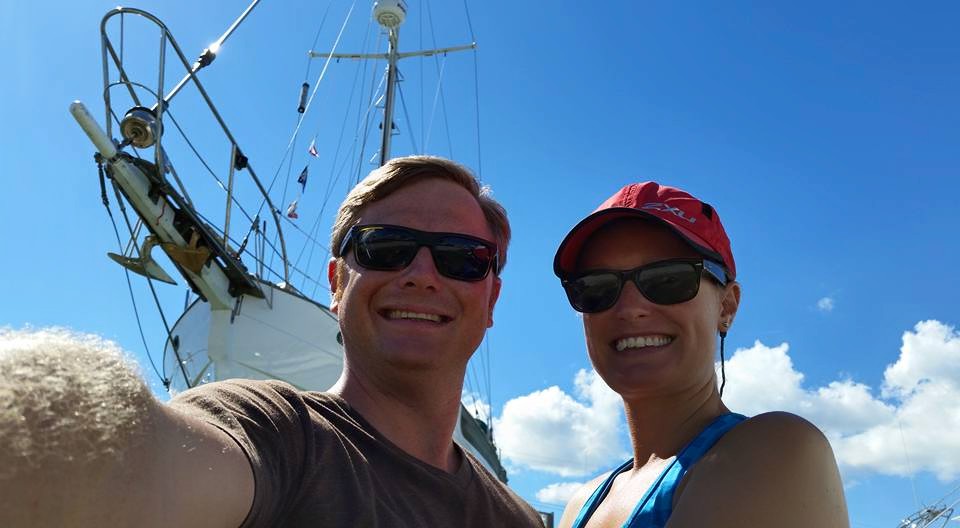
On a Beautiful November day in Florida under clear blue
skies and 85 degrees, we launched Wild Swan back in the water. We took a few
hour tour of Port Canaveral and even stuck her nose out into the ocean. We docked back in our slip just at sunset and
had a small party with our friends on the dock. Overall, the yard time went
well and a huge load was off our shoulders. We repaired a LOT of things on the
boat, many of which we didn’t know were wrong to begin with. I feel better
about her seaworthiness and I’m excited for us to start taking trips. Hopefully we will start our jaunts to the
Bahamas with the coming of the new year and I couldn’t be more excited.
 |
| Hauling out. Let it all Begin |
 |
| New Kranze Iron |
 |
| Completed work in Lazarette |
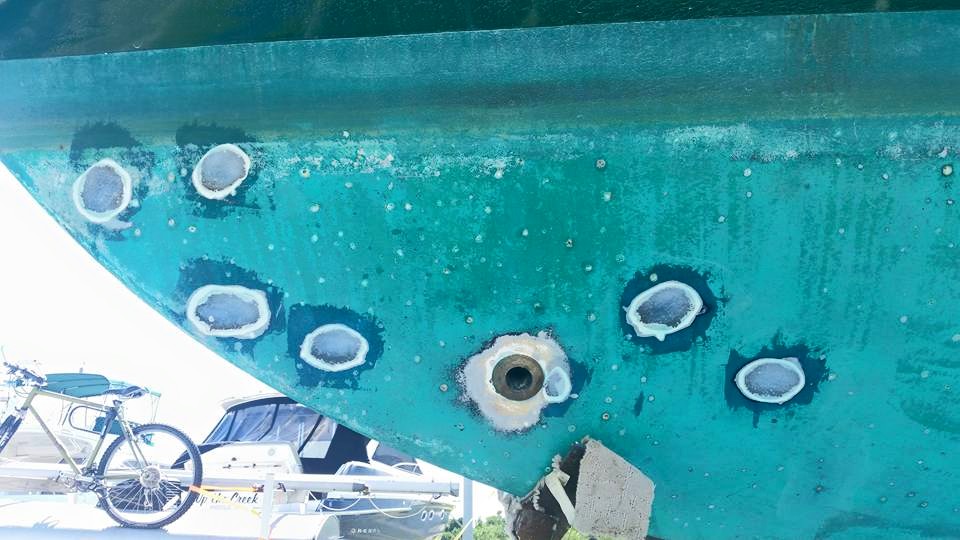 |
| Blister Repair |
 |
| The dang Cutlass bearing after I finally got it out |
 |
| Starting new counter top Project |
 |
| Finished with Counter Tops |
 |
| All ready to launch!! |
 |
| Waiting on the Travel lift |
 |
| Back in the water and ready for action |
No comments:
Post a Comment